No. 0130
Gyarados
Atrocious Pokémon
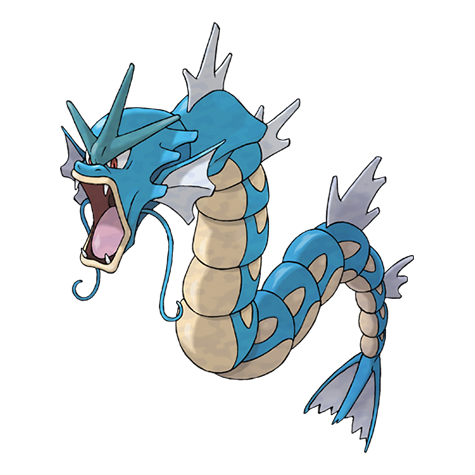
Turn it with the arrows or by dragging · pinch or scroll to zoom. Fan-made model from the Pokémon 3D API project.
- Height
- 6.5 m 21′04″
- Weight
- 235 kg 518.1 lbs
- Base stat total
- 540 top 14%
- Introduced
- Gen I

Turn it with the arrows or by dragging · pinch or scroll to zoom. Fan-made model from the Pokémon 3D API project.
- Height
- 6.5 m 21′04″
- Weight
- 305 kg 672.4 lbs
- Base stat total
- 640 top 2%
- Introduced
- Gen I
I suspect this Pokémon to be the true identity of a dragon written of in ancient texts, which claimed that it razed an entire village with white-hot beams from its maw.See all 18 entries
Base stats
Ranges: 0 IV/EV with a hindering nature to 31 IV/252 EV with a helpful nature. EV yield: 2 Atk.
Stat calculatorChampions Stat Points & Stat Alignment, or EVs, IVs & nature
Ranges: 0 IV/EV with a hindering nature to 31 IV/252 EV with a helpful nature. EV yield: 2 Atk.
Stat calculatorChampions Stat Points & Stat Alignment, or EVs, IVs & nature
Speed tiers
Speed at Lv 50 in Pokémon Champions (base 81). Scarf and Tailwind use the Max+ value.
At max Speed, Gyarados outspeeds 14 of the 30 most used Pokémon in Champions VGC.
- 203
 Mega Garchomp ZModest · 32 SP · #21 in usage
- 200
 Mega GengarTimid · 32 SP · #26 in usage
- 190
 Mega Raichu YTimid · 23 SP · #13 in usage
- 189
 Mega SalamenceTimid · 32 SP · #4 in usage
- 184
 WhimsicottTimid · 32 SP · #23 in usage
- 178
 Mega MetagrossJolly · 32 SP · #28 in usage
- 178
 Mega StaraptorJolly · 32 SP · #29 in usage
- 172
 SneaslerAdamant · 32 SP · #2 in usage
- 169
 Mega FloetteTimid · 32 SP · #17 in usage
- 169
 GarchompJolly · 32 SP · #19 in usage
- 167
 Mega Charizard YTimid · 32 SP · #14 in usage
- 167
 Mega GardevoirTimid · 32 SP · #20 in usage
- 161
 IndeedeeTimid · 32 SP · #30 in usage
- 156
 Hisuian ArcanineJolly · 32 SP · #16 in usage
- 150
 ArchaludonTimid · 32 SP · #9 in usage
- 149
 GholdengoTimid · 32 SP · #8 in usage
- 146Gyarados · Max+32 SP, Speed-raising alignment
- 143
 BasculegionJolly · 32 SP · #6 in usage
- 133Gyarados · Max32 SP, neutral alignment
- 128
 PelipperTimid · 32 SP · #12 in usage
- 120
 VolcaronaBold · 0 SP · #25 in usage
- 105
 RillaboomAdamant · 0 SP · #1 in usage
- 101Gyarados · No SP0 SP, neutral alignment
- 101
 MiloticCalm · 0 SP · #15 in usage
- 95
 SylveonModest · 15 SP · #18 in usage
- 94
 Female IndeedeeRelaxed · 0 SP · #7 in usage
- 90
 PolitoedCalm · 0 SP · #22 in usage
- 90
 SinistchaBold · 0 SP · #24 in usage
- 85
 ArmarougeQuiet · 0 SP · #27 in usage
- 80
 IncineroarCareful · 0 SP · #3 in usage
- 80
 FarigirafBold · 0 SP · #11 in usage
- 70
 KingambitAdamant · 0 SP · #5 in usage
- 60
 Mega GolisopodAdamant · 0 SP · #10 in usage
Others at their most common Speed investment in Champions VGC (Reg M-C · Doubles, Sep 2026); Pokémon holding a Mega Stone are shown as their Mega.
Type matchups
Weak to
Resists
Immune to
Takes normal damage from 10 types
Weak to
Resists
Immune to
Takes normal damage from 6 types
Abilities
- Intimidate
Lowers opponents' Attack one stage upon entering battle.
- MoxieHidden ability
Raises Attack one stage upon KOing a Pokémon.
- Mold Breaker
Bypasses targets' abilities if they could hinder or prevent a move.
Competitive
Ranked ladder · in-game
Doubles
#96 of 262 used
Gyaradosite (52.9%) · Intimidate (90.8%) · Adamant (51.2%) · HP 2 / Atk 32 / Spe 32 (20.1%)
Moves Waterfall, Protect, Dragon Dance, Crunch
Singles
#21 of 262 used
Gyaradosite (47.6%) · Intimidate (98.7%) · Adamant (44%) · HP 1 / Atk 32 / Def 1 / Spe 32 (12.2%)
Moves Earthquake, Power Whip, Dragon Dance, Waterfall
Daily usage rank on the Pokémon Champions ladder, updated Oct 28. Battle data provided by Pokémon Champions Battle Data.
3.81% of teams · rank #42 · Reg M-C · Singles · 1760+ rating · 69,462 battles · Sep 2026
Most common build
- Item
- Rocky Helmet
- Ability
- Intimidate
- Stat Alignment
- Impish
- Stat Points
- 31 HP / 1 Atk / 32 Def / 2 Spe
- Power Whip
- Avalanche
- Taunt
- Waterfall
Each part is the most used on its own, so not every team runs this exact set.
Usage by rating
- All players3.65%
- Rated 1500+4.08%
- Rated 1630+3.16%
- Rated 1760+3.81%
Usage by month
Moves
- Power Whip85.7%
- Avalanche80.5%
- Taunt61.1%
- Waterfall42%
- Temper Flare37%
- Earthquake35.8%
- Thunder Wave17.9%
- Dragon Dance15%
- Aqua Tail10.2%
- Ice Fang9.6%
Items
- Rocky Helmet69.2%
- Leftovers16.4%
- Wacan Berry7.6%
- Expert Belt3.2%
- Sitrus Berry1.2%
- Lum Berry1.1%
Abilities
- 99.4%
- 0.6%
EV spreads
- Impish 31 HP / 1 Atk / 32 Def / 2 Spe12.7%
- Impish 32 HP / 1 Atk / 32 Def / 1 Spe11%
- Adamant 31 HP / 32 Atk / 3 Def10.2%
- Adamant 1 HP / 32 Atk / 1 SpD / 32 Spe8.7%
- Impish 32 HP / 2 Atk / 32 Def7%
Common teammates
 Lucario-Mega-Z37.6%
- Garchomp28.9%
 Mimikyu25.3%
 Baxcalibur24.8%
- Garchomp-Mega-Z22.2%
 Hippowdon21.4%
- Gholdengo18%
 Glimmora16.4%
3.11% of teams · rank #51 · Singles · 1630+ rating · 33,671 battles · Sep 2026
Most common build
- Item
- Loaded Dice
- Ability
- Moxie
- Nature
- Adamant
- EVs
- 252 Atk / 4 SpD / 252 Spe
- Tera Type
- Dragon
- Waterfall
- Dragon Dance
- Scale Shot
- Taunt
Each part is the most used on its own, so not every team runs this exact set.
Usage by rating
- All players4.06%
- Rated 1500+3.79%
- Rated 1630+3.11%
- Rated 1760+3.56%
Usage by month
Moves
- Waterfall99.4%
- Dragon Dance96.5%
- Scale Shot71.9%
- Taunt42.4%
- Substitute32.8%
- Earthquake22.7%
- Ice Fang11.6%
- Crunch6.2%
- Temper Flare4.3%
- Outrage3%
Items
- Loaded Dice53.5%
- Leftovers29%
- Life Orb5.4%
- Heavy-Duty Boots3.6%
- Lum Berry2.7%
- Choice Band1.8%
Abilities
- 84.6%
- 15.4%
EV spreads
- Adamant 252 Atk / 4 SpD / 252 Spe86%
- Jolly 4 HP / 252 Atk / 252 Spe2.7%
- Adamant 4 HP / 252 Atk / 252 Spe2.3%
- Jolly 252 Atk / 4 SpD / 252 Spe2%
- Hardy 252 Atk / 4 SpD / 252 Spe1.8%
Tera types
- Dragon73.7%
- Ground10.5%
- Electric4.7%
- Water3.1%
Common teammates
 Thundurus-Therian56.9%
 Ninetales-Alola40.3%
 Bisharp39.5%
 Slither Wing39.5%
 Krookodile35.7%
 Tinkaton18.5%
 Latios17.6%
 Weavile16.1%
3.09% of teams · rank #61 · Singles, one type per team · 1630+ rating · 63,572 battles · Sep 2026
Most common build
- Item
- Heavy-Duty Boots
- Ability
- Intimidate
- Nature
- Jolly
- EVs
- 252 Atk / 4 SpD / 252 Spe
- Waterfall
- Earthquake
- Dragon Dance
- Rest
Each part is the most used on its own, so not every team runs this exact set.
Usage by rating
- All players2.33%
- Rated 1500+2.68%
- Rated 1630+3.09%
- Rated 1760+5.41%
Usage by month
Moves
- Waterfall95.3%
- Earthquake70.7%
- Dragon Dance60.2%
- Rest26.9%
- Taunt26%
- Thunder Wave25.3%
- Dragon Tail25.3%
- Outrage17.3%
- Substitute13.3%
- Ice Fang11%
Items
- Heavy-Duty Boots41.4%
- Leftovers39%
- Choice Scarf9.8%
- Focus Sash6.8%
- Lum Berry1.6%
- Loaded Dice0.5%
Abilities
- 62.1%
- 37.9%
EV spreads
- Jolly 252 Atk / 4 SpD / 252 Spe27.8%
- Impish 248 HP / 236 Def / 24 Spe22.5%
- Jolly 248 HP / 8 Def / 252 Spe19.2%
- Jolly 248 HP / 8 Atk / 252 Spe8%
- Adamant 252 Atk / 4 SpD / 252 Spe4.7%
Common teammates
 Corviknight59.7%
 Landorus-Therian54%
 Skarmory51.2%
 Enamorus37.7%
 Landorus33.4%
 Zapdos-Galar33.2%
 Iron Jugulis27.2%
 Mandibuzz25.4%
Checks & counters
- Archaludon60.7%
 Meowscarada53.1%
 Excadrill53.7%
 Greninja30.9%
 Mamoswine17.4%
- Hippowdon12.4%
0.56% of teams · rank #119 · Doubles · 1695+ rating · 196,031 battles · Sep 2026
Most common build
- Item
- Lum Berry
- Ability
- Intimidate
- Nature
- Jolly
- EVs
- 252 Atk / 252 Spe
- Tera Type
- Ground
- Waterfall
- Protect
- Dragon Dance
- Earthquake
Each part is the most used on its own, so not every team runs this exact set.
Usage by rating
- All players1.36%
- Rated 1500+1.09%
- Rated 1695+0.56%
- Rated 1825+0.21%
Usage by month
Moves
- Waterfall98.8%
- Protect64.2%
- Dragon Dance50.5%
- Earthquake44.3%
- Thunder Wave42.8%
- Iron Head24.6%
- Taunt23.7%
- Crunch21.1%
- Ice Fang8.4%
- Icy Wind7.6%
Items
- Lum Berry35.5%
- Quick Claw17.8%
- Leftovers15%
- Sitrus Berry11.1%
- Assault Vest4.9%
- Clear Amulet4.5%
Abilities
- 56.7%
- 43.3%
EV spreads
- Jolly 252 Atk / 252 Spe35.3%
- Adamant 108 HP / 252 Atk / 148 SpD17.4%
- Impish 252 HP / 8 Atk / 244 Def9.6%
- Adamant 252 Atk / 4 SpD / 252 Spe6.8%
- Adamant 252 HP / 172 Atk / 84 SpD6.6%
Tera types
- Ground58.1%
- Steel19.7%
- Water9.9%
- Grass5.3%
Common teammates
 Tornadus39%
 Moltres-Galar35.1%
- Landorus-Therian34.8%
 Murkrow34.2%
 Braviary-Hisui34%
 Tyranitar27.1%
 Basculegion-F21.9%
 Roaring Moon17.3%
0.4% of teams · rank #122 · Singles · 1630+ rating · 145,642 battles · Sep 2026
Most common build
- Item
- Mystic Water
- Ability
- Moxie
- Stat Alignment
- Jolly
- Stat Points
- 3 HP / 32 Atk / 2 SpD / 29 Spe
- Dragon Dance
- Waterfall
- Ice Fang
- Power Whip
Each part is the most used on its own, so not every team runs this exact set.
Usage by rating
- All players0.97%
- Rated 1500+0.65%
- Rated 1630+0.4%
- Rated 1760+0.18%
Usage by month
Moves
- Dragon Dance87.3%
- Waterfall86%
- Ice Fang59.7%
- Power Whip53.2%
- Taunt22.6%
- Earthquake19.5%
- Bounce17.3%
- Thunder Wave13%
- Aqua Tail11.1%
- Temper Flare7%
Items
- Mystic Water34.5%
- Leftovers23.9%
- Wide Lens10.4%
- Sitrus Berry5.9%
- Life Orb4.8%
- Chesto Berry4.8%
Abilities
- 56%
- 44%
EV spreads
- Jolly 3 HP / 32 Atk / 2 SpD / 29 Spe30.8%
- Adamant 2 HP / 32 Atk / 32 Spe19.5%
- Jolly 32 Atk / 2 SpD / 32 Spe12.6%
- Adamant 1 HP / 32 Atk / 1 SpD / 32 Spe6%
- Jolly 13 HP / 32 Atk / 21 Spe3.4%
Common teammates
- Excadrill47.9%
- Sneasler39.4%
- Golisopod-Mega26.8%
- Rillaboom26.7%
- Garchomp25.4%
- Corviknight23.8%
- Meowscarada19.2%
 Dragonite15.8%
0.33% of teams · rank #170 · Singles, all Pokémon · 1630+ rating · 426,601 battles · Sep 2026
Most common build
- Item
- Flyinium Z
- Ability
- Intimidate
- Nature
- Jolly
- EVs
- 252 Atk / 4 SpD / 252 Spe
- Dragon Dance
- Waterfall
- Earthquake
- Bounce
Each part is the most used on its own, so not every team runs this exact set.
Usage by rating
- All players1.13%
- Rated 1500+0.7%
- Rated 1630+0.33%
- Rated 1760+0.2%
Usage by month
Moves
- Dragon Dance92.4%
- Waterfall92%
- Earthquake53.4%
- Bounce45.1%
- Substitute29%
- Taunt18.5%
- Ice Fang14%
- Temper Flare11.6%
- Power Whip10.4%
- Thunder Wave6%
Items
- Flyinium Z41.6%
- Lum Berry20.6%
- Leftovers9.4%
- Groundium Z8.3%
- Dragonium Z4.7%
- Rocky Helmet3.8%
Abilities
- 51%
- 49%
EV spreads
- Jolly 252 Atk / 4 SpD / 252 Spe50%
- Adamant 252 Atk / 4 SpD / 252 Spe11.9%
- Jolly 4 HP / 252 Atk / 252 Spe10.1%
- Jolly 252 Atk / 4 Def / 252 Spe6.9%
- Jolly 252 Atk / 4 SpA / 252 Spe4%
Common teammates
- Dragonite20.4%
- Gholdengo19.7%
 Iron Treads19.1%
 Togekiss16.4%
- Excadrill15.2%
- Corviknight14.7%
 Kilowattrel14.4%
 Diancie-Mega14%
Checks & counters
- Landorus-Therian17.9%
0.11% of teams · rank #170 · Reg M-C · Doubles · 1760+ rating · 1,631,943 battles · Sep 2026
Most common build
- Item
- Sitrus Berry
- Ability
- Intimidate
- Stat Alignment
- Jolly
- Stat Points
- 5 HP / 31 Atk / 30 Spe
- Waterfall
- Protect
- Taunt
- Thunder Wave
Each part is the most used on its own, so not every team runs this exact set.
Usage by rating
- All players0.35%
- Rated 1500+0.23%
- Rated 1630+0.14%
- Rated 1760+0.11%
Usage by month
Moves
- Waterfall97.7%
- Protect55.8%
- Taunt39.7%
- Thunder Wave35.4%
- Power Whip33.3%
- Ice Fang26.1%
- Dragon Dance18.7%
- Helping Hand17.7%
- Earthquake12.1%
- Stone Edge11.9%
Items
- Sitrus Berry36.7%
- Rocky Helmet13.1%
- Life Orb11.4%
- Choice Scarf10.9%
- Leftovers8.5%
- White Herb7%
Abilities
- 97.3%
- 2.7%
EV spreads
- Jolly 5 HP / 31 Atk / 30 Spe7.8%
- Adamant 32 HP / 32 Atk / 1 SpD / 1 Spe6.6%
- Adamant 1 HP / 32 Atk / 1 SpD / 32 Spe6.2%
- Impish 32 HP / 19 Def / 4 SpD / 11 Spe5.2%
- Adamant 32 HP / 32 Atk / 2 Def5.1%
Common teammates
- Sneasler29.3%
- Rillaboom25.3%
- Gholdengo19%
- Kingambit15.1%
- Excadrill14.2%
 Tyranitar-Mega12.9%
- Raichu-Mega-Y12.8%
- Garchomp-Mega-Z12.6%
0.08% of teams · rank #193 · Singles · 1695+ rating · 574,541 battles · Sep 2026
Most common build
- Item
- Loaded Dice
- Ability
- Moxie
- Nature
- Adamant
- EVs
- 252 Atk / 4 SpD / 252 Spe
- Tera Type
- Dragon
- Earthquake
- Waterfall
- Dragon Dance
- Scale Shot
Each part is the most used on its own, so not every team runs this exact set.
Usage by rating
- All players1.03%
- Rated 1500+0.46%
- Rated 1695+0.08%
- Rated 1825+0.03%
Usage by month
Moves
- Earthquake93.4%
- Waterfall88.3%
- Dragon Dance83.4%
- Scale Shot52.2%
- Taunt14.3%
- Dragon Tail13.3%
- Whirlpool9.3%
- Temper Flare9%
- Ice Fang8.6%
- Thunder Wave4.5%
Items
- Loaded Dice51.3%
- Heavy-Duty Boots13.8%
- Rocky Helmet13.4%
- Leftovers10%
- Life Orb2.4%
- Mirror Herb2.1%
Abilities
- 67.1%
- 32.9%
EV spreads
- Adamant 252 Atk / 4 SpD / 252 Spe59.2%
- Impish 248 HP / 144 Def / 116 Spe9.3%
- Jolly 252 Atk / 4 SpD / 252 Spe8.5%
- Careful 252 HP / 240 SpD / 16 Spe3.7%
- Jolly 252 Atk / 4 Def / 252 Spe2.9%
Tera types
- Dragon62.3%
- Ground21.4%
- Water7.7%
- Ghost3.7%
Common teammates
 Great Tusk66.8%
 Dragapult50.7%
 Hatterene50.4%
 Heatran49.3%
 Zarude46.9%
 Slowking-Galar16%
- Meowscarada15.3%
- Gholdengo12.9%
0.06% of teams · rank #214 · Singles · 1630+ rating · 67,302 battles · Sep 2026
Most common build
- Item
- Leftovers
- Ability
- Moxie
- Nature
- Adamant
- EVs
- 4 HP / 252 Atk / 252 Spe
- Tera Type
- Water
- Dragon Dance
- Earthquake
- Waterfall
- Crunch
Each part is the most used on its own, so not every team runs this exact set.
Usage by rating
- All players0.69%
- Rated 1500+0.32%
- Rated 1630+0.06%
- Rated 1760+0.01%
Usage by month
Moves
- Dragon Dance87.2%
- Earthquake80.6%
- Waterfall76.3%
- Crunch40.1%
- Aqua Tail19.9%
- Scale Shot17.7%
- Ice Fang13.5%
- Stone Edge12.2%
- Thunder Wave8.2%
- Roar7.9%
Items
- Leftovers48.9%
- Mystic Water11.5%
- Heavy-Duty Boots11.4%
- Focus Sash9.1%
- Loaded Dice5.8%
- Expert Belt2.6%
Abilities
- 60%
- 40%
EV spreads
- Adamant 4 HP / 252 Atk / 252 Spe37.1%
- Adamant 252 Atk / 4 SpD / 252 Spe12.4%
- Hardy 252 Atk / 4 SpD / 252 Spe11.5%
- Jolly 96 HP / 124 Atk / 92 Def / 76 SpD / 120 Spe11.4%
- Careful 252 HP / 4 Atk / 252 SpD7.6%
Tera types
- Water66.1%
- Ground21.7%
- Dragon6.2%
- Flying3%
 Arceus
 Rayquaza
 Heracross
 Smeargle
 Honchkrow
 Scizor
 Bronzong
2.88% of teams · rank #57 · Singles, all Pokémon · 1630+ rating · 426,601 battles · Sep 2026
Most common build
- Item
- Gyaradosite
- Ability
- Mold Breaker
- Nature
- Jolly
- EVs
- 252 Atk / 4 SpD / 252 Spe
- Dragon Dance
- Waterfall
- Crunch
- Substitute
Each part is the most used on its own, so not every team runs this exact set.
Usage by rating
- All players2.11%
- Rated 1500+2.42%
- Rated 1630+2.88%
- Rated 1760+2.14%
Usage by month
Moves
- Dragon Dance99.6%
- Waterfall95%
- Crunch89%
- Substitute46.4%
- Taunt26.2%
- Earthquake25.4%
- Power Whip7%
- Temper Flare6%
- Bounce2%
- Ice Fang1.1%
Items
- Gyaradosite100%
Abilities
- 100%
EV spreads
- Jolly 252 Atk / 4 SpD / 252 Spe35.7%
- Adamant 4 HP / 252 Atk / 252 Spe24.3%
- Adamant 252 Atk / 4 SpD / 252 Spe11.3%
- Jolly 4 HP / 252 Atk / 252 Spe6%
- Adamant 40 HP / 252 Atk / 8 SpD / 208 Spe5.5%
Common teammates
- Hatterene23.4%
- Volcarona19.7%
 Ceruledge19.3%
 Iron Valiant19%
- Kingambit18.7%
- Iron Treads15.9%
- Garchomp14.3%
- Landorus-Therian13.2%
Checks & counters
 Zamazenta66.3%
- Iron Valiant67.3%
 Kommo-o76.2%
 Lopunny-Mega58.8%
 Kartana68.9%
- Rillaboom61.2%
1.61% of teams · rank #73 · Reg M-C · Singles · 1760+ rating · 69,462 battles · Sep 2026
Most common build
- Item
- Gyaradosite
- Ability
- Mold Breaker
- Stat Alignment
- Jolly
- Stat Points
- 2 HP / 32 Atk / 32 Spe
- Earthquake
- Dragon Dance
- Waterfall
- Ice Fang
Each part is the most used on its own, so not every team runs this exact set.
Usage by rating
- All players2.21%
- Rated 1500+2.19%
- Rated 1630+1.84%
- Rated 1760+1.61%
Usage by month
Moves
- Earthquake91.9%
- Dragon Dance88.4%
- Waterfall76.5%
- Ice Fang46.3%
- Power Whip28.5%
- Crunch26%
- Taunt15%
- Aqua Tail11.3%
- Avalanche9.6%
- Temper Flare3.3%
Items
- Gyaradosite100%
Abilities
- 100%
EV spreads
- Jolly 2 HP / 32 Atk / 32 Spe22.9%
- Jolly 1 HP / 32 Atk / 1 Def / 32 Spe21.5%
- Adamant 1 HP / 32 Atk / 1 SpD / 32 Spe11.1%
- Adamant 21 HP / 32 Atk / 13 Def8.1%
- Adamant 2 HP / 32 Atk / 32 Spe7.8%
Common teammates
- Gholdengo38.3%
- Garchomp33.9%
 Blaziken24%
- Ninetales-Alola21.3%
- Lucario-Mega-Z18.5%
 Scolipede16.9%
 Clefable-Mega16.2%
 Primarina14.9%
0.46% of teams · rank #116 · Singles · 1630+ rating · 145,642 battles · Sep 2026
Most common build
- Item
- Gyaradosite
- Ability
- Mold Breaker
- Stat Alignment
- Adamant
- Stat Points
- 1 HP / 32 Atk / 1 SpD / 32 Spe
- Dragon Dance
- Crunch
- Earthquake
- Taunt
Each part is the most used on its own, so not every team runs this exact set.
Usage by rating
- All players0.53%
- Rated 1500+0.44%
- Rated 1630+0.46%
- Rated 1760+0.24%
Usage by month
Moves
- Dragon Dance99.9%
- Crunch93.2%
- Earthquake75.6%
- Taunt55.7%
- Waterfall37.3%
- Ice Fang17.1%
- Power Whip12.6%
- Substitute6.5%
- Temper Flare1.6%
- Aqua Tail0.1%
Items
- Gyaradosite100%
Abilities
- 100%
EV spreads
- Adamant 1 HP / 32 Atk / 1 SpD / 32 Spe36.1%
- Adamant 2 HP / 32 Atk / 32 Spe29.4%
- Jolly 2 HP / 32 Atk / 32 Spe17%
- Jolly 32 Atk / 32 Spe6%
- Jolly 32 HP / 2 Def / 32 Spe3.7%
Common teammates
- Volcarona74.1%
- Glimmora62.9%
 Samurott-Hisui55.6%
- Ceruledge49.7%
 Serperior41.4%
 Quaquaval15.8%
- Kingambit14%
- Corviknight12.7%
0.23% of teams · rank #129 · Reg M-C · Doubles · 1760+ rating · 1,631,943 battles · Sep 2026
Most common build
- Item
- Gyaradosite
- Ability
- Mold Breaker
- Stat Alignment
- Adamant
- Stat Points
- 2 HP / 32 Atk / 32 Spe
- Protect
- Waterfall
- Dragon Dance
- Crunch
Each part is the most used on its own, so not every team runs this exact set.
Usage by rating
- All players0.46%
- Rated 1500+0.42%
- Rated 1630+0.28%
- Rated 1760+0.23%
Usage by month
Moves
- Protect96.6%
- Waterfall96.3%
- Dragon Dance86.6%
- Crunch60.3%
- Lash Out31.7%
- Earthquake10.9%
- Ice Fang7.8%
- Power Whip2.2%
- Iron Head1.5%
- Avalanche1.5%
Items
- Gyaradosite100%
Abilities
- 100%
EV spreads
- Adamant 2 HP / 32 Atk / 32 Spe9.3%
- Jolly 2 HP / 32 Atk / 32 Spe8.1%
- Jolly 9 HP / 25 Atk / 32 Spe8%
- Adamant 19 HP / 15 Atk / 1 Def / 1 SpD / 30 Spe7.9%
- Adamant 26 HP / 22 Atk / 5 Def / 13 Spe7.3%
Common teammates
- Rillaboom33.7%
- Sneasler30.3%
- Volcarona26.9%
- Gholdengo23.8%
- Farigiraf16.1%
 Froslass-Mega16%
- Corviknight9.8%
- Kingambit9.5%
Evolution


Moves
Level up 19
TM / HM / TR 54
No moves match those filters.
Pokédex entries
- Category
- Atrocious Pokémon
- Debut
- Kanto · Red & Green (JP)
- Color
- Blue
- Shape
- Habitat
- Water's Edge
- Pal Park area
- Pond
I suspect this Pokémon to be the true identity of a dragon written of in ancient texts, which claimed that it razed an entire village with white-hot beams from its maw.
Legends: ArceusThe energy from evolution stimulated its brain cells strongly, causing it to become very ferocious.
Ultra MoonIt fires hyper beams in all directions, burning the surrounding area to ash. There are some regions where it’s called “the deity of destruction.”
Ultra SunThere are people who swear that any place Gyarados appears is fated for destruction.
MoonA tale is told of a town that angered Gyarados. Before the sun rose the next day, flames utterly consumed the town, leaving not a trace behind.
SunThey say that during past strife, GYARADOS would appear and leave blazing ruins in its wake.
HeartGoldOnce it begins to rampage, a GYARADOS will burn everything down, even in a harsh storm.
Platinum · Black · White · Black 2 · White 2 · ShieldIn ancient literature, there is a record of a GYARADOS that razed a village when violence flared.
Pearl · XOnce it appears, its rage never settles until it has razed the fields and mountains around it.
DiamondIt has an extremely aggressive nature. The HYPER BEAM it shoots from its mouth totally incinerates all targets.
FireRed · SwordIt is an extremely vicious and violent Pokémon. When humans begin to fight, it will appear and burn everything to the ground with intensely hot flames.
EmeraldOnce GYARADOS goes on a rampage, its ferociously violent blood doesn’t calm until it has burned everything down. There are records of this Pokémon’s rampages lasting a whole month.
Sapphire · Alpha SapphireWhen MAGIKARP evolves into GYARADOS, its brain cells undergo a structural transformation. It is said that this transformation is to blame for this Pokémon’s wildly violent nature.
Ruby · Omega RubyIt appears whenever there is world conflict, burning down any place it travels through.
CrystalOnce it appears, it goes on a rampage. It remains enraged until it demolishes everything around it.
Silver · SoulSilverThey say that during past wars, GYARADOS would appear and leave blazing ruins in its wake.
GoldBrutally vicious and enormously destructive. Known for totally destroying cities in ancient times.
Yellow · Let’s Go, Pikachu! · Let’s Go, Eevee!Rarely seen in the wild. Huge and vicious, it is capable of destroying entire cities in a rage.
Red · Blue · LeafGreen · Y
Names around the world
- Japanese
- ギャラドス
- Japanese (romaji)
- Gyarados
- Korean
- 갸라도스
- Chinese (Traditional)
- 暴鯉龍
- Chinese (Simplified)
- 暴鲤龙
- French
- Léviator
- German
- Garados
- Spanish
- Gyarados
- Italian
- Gyarados
Sprites
Tap any sprite to show it on the Pokédex above. ▶ marks official animations; Gen VIII–IX models are large, so they load only when you tap them.
Official artwork
3D models
Generation I
Generation II
Generation III
Generation IV
Generation V
Generation VI
Generation VII
Generation VIII · animated models
Generation IX · animated models
Tap any sprite to show it on the Pokédex above. ▶ marks official animations; Gen VIII–IX models are large, so they load only when you tap them.
Official artwork
3D models
Generation VI
Generation VII
Generation IX · animated models
Training
- EV yield
- 2 Atk
- Catch rate
- 45 ≈5.9% with a Poké Ball at full HP
- Base friendship
- 70
- Base experience
- 189
- Growth rate
- Slow
- EV yield
- 2 Atk
- Catch rate
- 45 ≈5.9% with a Poké Ball at full HP
- Base friendship
- 70
- Base experience
- 224
- Growth rate
- Slow
Breeding
- Egg groups
- Water 2Dragon
- Gender
- ♂ 50%♀ 50%
- Hatch time
- 5 egg cycles ≈1,530 steps (Gen IV–VII)
Males and females look different


Where to find
Shield: The Crown Tundra 10 areas
- Ballimere LakeFishing at bubbling spots in the water · Lv 60–65
- Ballimere Lake (Max Den N)Catch a wild Dynamax or Gigantamax Pokémon in a Max Raid battle. · Lv 45–60
- Frigid SeaFishing at bubbling spots in the water · Lv 60–65
- Frigid Sea (Max Den C)Catch a wild Dynamax or Gigantamax Pokémon in a Max Raid battle. · Lv 45–60
- Giant's BedFishing at bubbling spots in the water, Special overworld spawn in a fixed location in the water. · Lv 60–67
- Giant's Bed (Max Den F)Catch a wild Dynamax or Gigantamax Pokémon in a Max Raid battle. · Lv 45–60
- Giant's Bed (Max Den P)Catch a wild Dynamax or Gigantamax Pokémon in a Max Raid battle. · Lv 45–60
- Giant's FootFishing at bubbling spots in the water · Lv 60–65
- Giant's Foot (Max Den B)Catch a wild Dynamax or Gigantamax Pokémon in a Max Raid battle. · Lv 45–60
- Snowslide SlopeFishing at bubbling spots in the water · Lv 60–65
Shield: The Isle of Armor 15 areas
- Challenge BeachSpecial overworld spawn in a fixed location in the water. · Lv 50–60
- Challenge Beach (Max Den A)Catch a wild Dynamax or Gigantamax Pokémon in a Max Raid battle. · Lv 55–60
- Forest of Focus (Max Den E)Catch a wild Dynamax or Gigantamax Pokémon in a Max Raid battle. · Lv 55–60
- Honeycalm IslandSurfing in the overworld · Lv 40–60
- Honeycalm SeaSurfing in the overworld · Lv 40–60
- Honeycalm Sea (Max Den A)Catch a wild Dynamax or Gigantamax Pokémon in a Max Raid battle. · Lv 45–60
- Insular SeaSurfing in the overworld · Lv 40–60
- Loop LagoonSpecial overworld spawn in a fixed location in the water. · Lv 50–60
- Loop Lagoon (Max Den D)Catch a wild Dynamax or Gigantamax Pokémon in a Max Raid battle. · Lv 45–60
- Soothing Wetlands (Max Den A)Catch a wild Dynamax or Gigantamax Pokémon in a Max Raid battle. · Lv 55–60
- Stepping-Stone Sea (Main Area)Surfing in the overworld · Lv 40–60
- Stepping-Stone Sea (Max Den C)Catch a wild Dynamax or Gigantamax Pokémon in a Max Raid battle. · Lv 35–60
- Workout SeaSurfing in the overworld · Lv 40–60
- Workout Sea (Max Den F)Catch a wild Dynamax or Gigantamax Pokémon in a Max Raid battle. · Lv 45–60
- Workout Sea (Max Den G)Catch a wild Dynamax or Gigantamax Pokémon in a Max Raid battle. · Lv 35–60
Sword: The Crown Tundra 10 areas
- Ballimere LakeFishing at bubbling spots in the water · Lv 60–65
- Ballimere Lake (Max Den N)Catch a wild Dynamax or Gigantamax Pokémon in a Max Raid battle. · Lv 45–60
- Frigid SeaFishing at bubbling spots in the water · Lv 60–65
- Frigid Sea (Max Den C)Catch a wild Dynamax or Gigantamax Pokémon in a Max Raid battle. · Lv 45–60
- Giant's BedFishing at bubbling spots in the water, Special overworld spawn in a fixed location in the water. · Lv 60–67
- Giant's Bed (Max Den F)Catch a wild Dynamax or Gigantamax Pokémon in a Max Raid battle. · Lv 45–60
- Giant's Bed (Max Den P)Catch a wild Dynamax or Gigantamax Pokémon in a Max Raid battle. · Lv 45–60
- Giant's FootFishing at bubbling spots in the water · Lv 60–65
- Giant's Foot (Max Den B)Catch a wild Dynamax or Gigantamax Pokémon in a Max Raid battle. · Lv 45–60
- Snowslide SlopeFishing at bubbling spots in the water · Lv 60–65
Sword: The Isle of Armor 15 areas
- Challenge BeachSpecial overworld spawn in a fixed location in the water. · Lv 50–60
- Challenge Beach (Max Den A)Catch a wild Dynamax or Gigantamax Pokémon in a Max Raid battle. · Lv 55–60
- Forest of Focus (Max Den E)Catch a wild Dynamax or Gigantamax Pokémon in a Max Raid battle. · Lv 55–60
- Honeycalm IslandSurfing in the overworld · Lv 40–60
- Honeycalm SeaSurfing in the overworld · Lv 40–60
- Honeycalm Sea (Max Den A)Catch a wild Dynamax or Gigantamax Pokémon in a Max Raid battle. · Lv 45–60
- Insular SeaSurfing in the overworld · Lv 40–60
- Loop LagoonSpecial overworld spawn in a fixed location in the water. · Lv 50–60
- Loop Lagoon (Max Den D)Catch a wild Dynamax or Gigantamax Pokémon in a Max Raid battle. · Lv 45–60
- Soothing Wetlands (Max Den A)Catch a wild Dynamax or Gigantamax Pokémon in a Max Raid battle. · Lv 55–60
- Stepping-Stone Sea (Main Area)Surfing in the overworld · Lv 40–60
- Stepping-Stone Sea (Max Den C)Catch a wild Dynamax or Gigantamax Pokémon in a Max Raid battle. · Lv 35–60
- Workout SeaSurfing in the overworld · Lv 40–60
- Workout Sea (Max Den F)Catch a wild Dynamax or Gigantamax Pokémon in a Max Raid battle. · Lv 45–60
- Workout Sea (Max Den G)Catch a wild Dynamax or Gigantamax Pokémon in a Max Raid battle. · Lv 35–60
Shield 23 areas
- Axew's EyeFishing at bubbling spots in the water · Lv 35–60
- Bridge FieldFishing at bubbling spots in the water, Special overworld spawn in a fixed location in the water. · Lv 26–60
- Bridge Field (Max Den G)Catch a wild Dynamax or Gigantamax Pokémon in a Max Raid battle. · Lv 45–60
- Dusty BowlFishing at bubbling spots in the water, Special overworld spawn in a fixed location in the water. · Lv 40–60
- Dusty Bowl (Max Den E)Catch a wild Dynamax or Gigantamax Pokémon in a Max Raid battle. · Lv 55–60
- East Lake AxewellSpecial overworld spawn in a fixed location in the water. · Lv 56–60
- East Lake Axewell (Max Den E)Catch a wild Dynamax or Gigantamax Pokémon in a Max Raid battle. · Lv 45–60
- Giant's Cap (Main Area)Fishing at bubbling spots in the water · Lv 26–60
- Giant's Cap (Max Den D)Catch a wild Dynamax or Gigantamax Pokémon in a Max Raid battle. · Lv 45–60
- Giant's Mirror (Main Area)Fishing at bubbling spots in the water · Lv 26–60
- Giant's SeatFishing at bubbling spots in the water · Lv 30–60
- Lake of OutrageFishing at bubbling spots in the water, Special overworld spawn in a fixed location in the water. · Lv 50–60
- Lake of Outrage (Max Den A)Catch a wild Dynamax or Gigantamax Pokémon in a Max Raid battle. · Lv 45–60
- North Lake MilochSpecial overworld spawn in a fixed location in the water. · Lv 56–60
- Route 2 (Lake)Surfing in the overworld · Lv 38–40
- South Lake Miloch (Main Area)Special overworld spawn in a fixed location in the water. · Lv 56–60
- South Lake Miloch (Max Den C)Catch a wild Dynamax or Gigantamax Pokémon in a Max Raid battle. · Lv 45–60
- West Lake AxewellSpecial overworld spawn in a fixed location in the water. · Lv 56–60
- West Lake Axewell (Max Den A)Catch a wild Dynamax or Gigantamax Pokémon in a Max Raid battle. · Lv 55–60
- West Lake Axewell (Max Den B)Catch a wild Dynamax or Gigantamax Pokémon in a Max Raid battle. · Lv 45–60
- West Lake Axewell (Max Den C)Catch a wild Dynamax or Gigantamax Pokémon in a Max Raid battle. · Lv 55–60
- West Lake Axewell (Max Den E)Catch a wild Dynamax or Gigantamax Pokémon in a Max Raid battle. · Lv 45–60
- West Lake Axewell (Max Den F)Catch a wild Dynamax or Gigantamax Pokémon in a Max Raid battle. · Lv 45–60
Sword 23 areas
- Axew's EyeFishing at bubbling spots in the water · Lv 35–60
- Bridge FieldFishing at bubbling spots in the water, Special overworld spawn in a fixed location in the water. · Lv 26–60
- Bridge Field (Max Den G)Catch a wild Dynamax or Gigantamax Pokémon in a Max Raid battle. · Lv 45–60
- Dusty BowlFishing at bubbling spots in the water, Special overworld spawn in a fixed location in the water. · Lv 40–60
- Dusty Bowl (Max Den E)Catch a wild Dynamax or Gigantamax Pokémon in a Max Raid battle. · Lv 55–60
- East Lake AxewellSpecial overworld spawn in a fixed location in the water. · Lv 56–60
- East Lake Axewell (Max Den E)Catch a wild Dynamax or Gigantamax Pokémon in a Max Raid battle. · Lv 45–60
- Giant's Cap (Main Area)Fishing at bubbling spots in the water · Lv 26–60
- Giant's Cap (Max Den D)Catch a wild Dynamax or Gigantamax Pokémon in a Max Raid battle. · Lv 45–60
- Giant's Mirror (Main Area)Fishing at bubbling spots in the water · Lv 26–60
- Giant's SeatFishing at bubbling spots in the water · Lv 30–60
- Lake of OutrageFishing at bubbling spots in the water, Special overworld spawn in a fixed location in the water. · Lv 50–60
- Lake of Outrage (Max Den A)Catch a wild Dynamax or Gigantamax Pokémon in a Max Raid battle. · Lv 45–60
- North Lake MilochSpecial overworld spawn in a fixed location in the water. · Lv 56–60
- Route 2 (Lake)Surfing in the overworld · Lv 38–40
- South Lake Miloch (Main Area)Special overworld spawn in a fixed location in the water. · Lv 56–60
- South Lake Miloch (Max Den C)Catch a wild Dynamax or Gigantamax Pokémon in a Max Raid battle. · Lv 45–60
- West Lake AxewellSpecial overworld spawn in a fixed location in the water. · Lv 56–60
- West Lake Axewell (Max Den A)Catch a wild Dynamax or Gigantamax Pokémon in a Max Raid battle. · Lv 55–60
- West Lake Axewell (Max Den B)Catch a wild Dynamax or Gigantamax Pokémon in a Max Raid battle. · Lv 45–60
- West Lake Axewell (Max Den C)Catch a wild Dynamax or Gigantamax Pokémon in a Max Raid battle. · Lv 55–60
- West Lake Axewell (Max Den E)Catch a wild Dynamax or Gigantamax Pokémon in a Max Raid battle. · Lv 45–60
- West Lake Axewell (Max Den F)Catch a wild Dynamax or Gigantamax Pokémon in a Max Raid battle. · Lv 45–60
Let’s Go, Eevee! 1 area
- Road 20Surfing in the overworld · Lv 37–42
Let’s Go, Pikachu! 1 area
- Road 20Surfing in the overworld · Lv 37–42
Ultra Moon 21 areas
- Akala OutskirtsSOS Battle, SOS Battle from bubbling spots · Lv 10–29
- Ancient Poni PathSOS Battle, SOS Battle from bubbling spots · Lv 10–49
- Brooklet HillSOS Battle, SOS Battle from bubbling spots · Lv 10–21
- Hau'oli CitySOS Battle, SOS Battle from bubbling spots · Lv 10–22
- Kala’e BaySOS Battle, SOS Battle from bubbling spots · Lv 10–22
- Malie GardenFishing at bubbling spots in the water, Fishing with a Super Rod, SOS Battle, SOS Battle from bubbling spots · Lv 10–33
- Melemele SeaSOS Battle, SOS Battle from bubbling spots · Lv 10–22
- Paniola TownSOS Battle, SOS Battle from bubbling spots · Lv 10–22
- Poni Breaker CoastSOS Battle, SOS Battle from bubbling spots · Lv 10–49
- Poni GauntletSOS Battle, SOS Battle from bubbling spots · Lv 10–66
- Poni MeadowSOS Battle, SOS Battle from bubbling spots · Lv 10–62
- Route 13SOS Battle · Lv 10–33
- Route 14SOS Battle, SOS Battle from bubbling spots · Lv 10–39
- Route 15SOS Battle, SOS Battle from bubbling spots · Lv 10–40
- Route 7SOS Battle, SOS Battle from bubbling spots · Lv 10–23
- Route 8SOS Battle, SOS Battle from bubbling spots · Lv 10–25
- Route 9SOS Battle · Lv 10–23
- Seafolk VillageSOS Battle, SOS Battle from bubbling spots · Lv 10–49
- Seaward CaveSOS Battle, SOS Battle from bubbling spots · Lv 10–22
- Tapu VillageSOS Battle, SOS Battle from bubbling spots · Lv 10–39
- Vast Poni CanyonSOS Battle, SOS Battle from bubbling spots · Lv 10–51
Ultra Sun 21 areas
- Akala OutskirtsSOS Battle, SOS Battle from bubbling spots · Lv 10–29
- Ancient Poni PathSOS Battle, SOS Battle from bubbling spots · Lv 10–49
- Brooklet HillSOS Battle, SOS Battle from bubbling spots · Lv 10–21
- Hau'oli CitySOS Battle, SOS Battle from bubbling spots · Lv 10–22
- Kala’e BaySOS Battle, SOS Battle from bubbling spots · Lv 10–22
- Malie GardenFishing at bubbling spots in the water, Fishing with a Super Rod, SOS Battle, SOS Battle from bubbling spots · Lv 10–33
- Melemele SeaSOS Battle, SOS Battle from bubbling spots · Lv 10–22
- Paniola TownSOS Battle, SOS Battle from bubbling spots · Lv 10–22
- Poni Breaker CoastSOS Battle, SOS Battle from bubbling spots · Lv 10–49
- Poni GauntletSOS Battle, SOS Battle from bubbling spots · Lv 10–66
- Poni MeadowSOS Battle, SOS Battle from bubbling spots · Lv 10–62
- Route 13SOS Battle · Lv 10–33
- Route 14SOS Battle, SOS Battle from bubbling spots · Lv 10–39
- Route 15SOS Battle, SOS Battle from bubbling spots · Lv 10–40
- Route 7SOS Battle, SOS Battle from bubbling spots · Lv 10–23
- Route 8SOS Battle, SOS Battle from bubbling spots · Lv 10–25
- Route 9SOS Battle · Lv 10–23
- Seafolk VillageSOS Battle, SOS Battle from bubbling spots · Lv 10–49
- Seaward CaveSOS Battle, SOS Battle from bubbling spots · Lv 10–22
- Tapu VillageSOS Battle, SOS Battle from bubbling spots · Lv 10–39
- Vast Poni CanyonSOS Battle, SOS Battle from bubbling spots · Lv 10–51
Moon 20 areas
- Brooklet HillSOS Battle, SOS Battle from bubbling spots · Lv 10–15
- Kala’e BaySOS Battle, SOS Battle from bubbling spots · Lv 10–15
- Malie GardenSOS Battle · Lv 10–27
- Melemele SeaSOS Battle, SOS Battle from bubbling spots · Lv 10–18
- Paniola TownSOS Battle, SOS Battle from bubbling spots · Lv 10–18
- Poni Breaker CoastSOS Battle, SOS Battle from bubbling spots · Lv 10–43
- Poni GauntletSOS Battle, SOS Battle from bubbling spots · Lv 10–59
- Poni MeadowSOS Battle, SOS Battle from bubbling spots · Lv 10–57
- Poni WildsSOS Battle, SOS Battle from bubbling spots · Lv 10–43
- Route 13SOS Battle · Lv 10–30
- Route 14SOS Battle, SOS Battle from bubbling spots · Lv 10–31
- Route 15SOS Battle, SOS Battle from bubbling spots · Lv 10–33
- Route 7SOS Battle · Lv 10–19
- Route 8SOS Battle, SOS Battle from bubbling spots · Lv 10–25
- Route 9SOS Battle · Lv 10–23
- Seafolk VillageSOS Battle, SOS Battle from bubbling spots · Lv 10–43
- Seaward CaveSOS Battle, SOS Battle from bubbling spots · Lv 10–15
- Secluded ShoreSOS Battle · Lv 10–30
- Tapu VillageSOS Battle, SOS Battle from bubbling spots · Lv 10–31
- Vast Poni CanyonSOS Battle, SOS Battle from bubbling spots · Lv 10–44
Sun 20 areas
- Brooklet HillSOS Battle, SOS Battle from bubbling spots · Lv 10–15
- Kala’e BaySOS Battle, SOS Battle from bubbling spots · Lv 10–15
- Malie GardenSOS Battle · Lv 10–27
- Melemele SeaSOS Battle, SOS Battle from bubbling spots · Lv 10–18
- Paniola TownSOS Battle, SOS Battle from bubbling spots · Lv 10–18
- Poni Breaker CoastSOS Battle, SOS Battle from bubbling spots · Lv 10–43
- Poni GauntletSOS Battle, SOS Battle from bubbling spots · Lv 10–59
- Poni MeadowSOS Battle, SOS Battle from bubbling spots · Lv 10–57
- Poni WildsSOS Battle, SOS Battle from bubbling spots · Lv 10–43
- Route 13SOS Battle · Lv 10–30
- Route 14SOS Battle, SOS Battle from bubbling spots · Lv 10–31
- Route 15SOS Battle, SOS Battle from bubbling spots · Lv 10–33
- Route 7SOS Battle · Lv 10–19
- Route 8SOS Battle, SOS Battle from bubbling spots · Lv 10–25
- Route 9SOS Battle · Lv 10–23
- Seafolk VillageSOS Battle, SOS Battle from bubbling spots · Lv 10–43
- Seaward CaveSOS Battle, SOS Battle from bubbling spots · Lv 10–15
- Secluded ShoreSOS Battle · Lv 10–30
- Tapu VillageSOS Battle, SOS Battle from bubbling spots · Lv 10–31
- Vast Poni CanyonSOS Battle, SOS Battle from bubbling spots · Lv 10–44
Y 4 areas
- Friend Safari (Water)Walking in tall grass or a cave · Lv 30
- Parfum PalaceFishing with a Super Rod · Lv 35
- Road 22Fishing with a Super Rod · Lv 35
- Road 3Fishing with a Super Rod · Lv 35
X 4 areas
- Friend Safari (Water)Walking in tall grass or a cave · Lv 30
- Parfum PalaceFishing with a Super Rod · Lv 35
- Road 22Fishing with a Super Rod · Lv 35
- Road 3Fishing with a Super Rod · Lv 35
White 2 1 area
- Nature SanctuaryFishing in dark spots · Lv 1–100
Black 2 1 area
- Nature SanctuaryFishing in dark spots · Lv 1–100
SoulSilver 10 areas
- Cerulean Cave (1F)Fishing with a Super Rod · Lv 40
- Cerulean Cave (2F)Fishing with a Super Rod · Lv 40
- Cerulean Cave (B1F)Fishing with a Super Rod · Lv 40
- Fuchsia CityFishing with a Good Rod, Fishing with a Super Rod · Lv 20–40
- Lake of RageFishing with a Good Rod, Fishing with a Super Rod, Static encounter, Surfing · Lv 10–40
- Mount Silver (1F)Fishing with a Good Rod, Fishing with a Super Rod · Lv 20–40
- Safari Zone MarshlandFishing with a Good Rod, Fishing with a Super Rod · Lv 26–37
- Safari Zone MeadowFishing with a Good Rod, Fishing with a Super Rod · Lv 28–45
- Safari Zone WetlandFishing with a Super Rod · Lv 44–48
- Seafoam Islands (B4F)Fishing with a Super Rod · Lv 40
HeartGold 10 areas
- Cerulean Cave (1F)Fishing with a Super Rod · Lv 40
- Cerulean Cave (2F)Fishing with a Super Rod · Lv 40
- Cerulean Cave (B1F)Fishing with a Super Rod · Lv 40
- Fuchsia CityFishing with a Good Rod, Fishing with a Super Rod · Lv 20–40
- Lake of RageFishing with a Good Rod, Fishing with a Super Rod, Static encounter, Surfing · Lv 10–40
- Mount Silver (1F)Fishing with a Good Rod, Fishing with a Super Rod · Lv 20–40
- Safari Zone MarshlandFishing with a Good Rod, Fishing with a Super Rod · Lv 26–37
- Safari Zone MeadowFishing with a Good Rod, Fishing with a Super Rod · Lv 28–45
- Safari Zone WetlandFishing with a Super Rod · Lv 44–48
- Seafoam Islands (B4F)Fishing with a Super Rod · Lv 40
Platinum 53 areas
- Canalave CityFishing with a Super Rod · Lv 30–55
- Celestic TownFishing with a Super Rod · Lv 30–55
- Eterna CityFishing with a Super Rod · Lv 30–55
- Fuego IronworksFishing with a Super Rod · Lv 30–55
- Great Marsh Area 1Fishing with a Super Rod · Lv 30–55
- Great Marsh Area 2Fishing with a Super Rod · Lv 30–55
- Great Marsh Area 3Fishing with a Super Rod · Lv 30–55
- Great Marsh Area 4Fishing with a Super Rod · Lv 30–55
- Great Marsh Area 5Fishing with a Super Rod · Lv 30–55
- Great Marsh Area 6Fishing with a Super Rod · Lv 30–55
- Iron Island areaFishing with a Super Rod · Lv 30–55
- Lake AcuityFishing with a Super Rod · Lv 30–55
- Lake ValorFishing with a Super Rod · Lv 30–55
- Lake Verity (after Galactic intervention)Fishing with a Super Rod · Lv 30–55
- Lake Verity (before Galactic intervention)Fishing with a Super Rod · Lv 30–55
- Mount Coronet (1F Road 207)Fishing with a Super Rod · Lv 20–55
- Mount Coronet (4F)Fishing with a Super Rod · Lv 30–55
- Mount Coronet (B1F)Fishing with a Super Rod · Lv 30–55
- Oreburgh Gate (B1F)Fishing with a Super Rod · Lv 30–55
- Pastoria CityFishing with a Super Rod · Lv 30–55
- Ravaged PathFishing with a Super Rod · Lv 30–55
- Road 203Fishing with a Super Rod · Lv 30–55
- Road 204 (north, towards Floaroma Town)Fishing with a Super Rod · Lv 30–55
- Road 204 (south, towards Jubilife City)Fishing with a Super Rod · Lv 30–55
- Road 205 (east, towards Eterna City)Fishing with a Super Rod · Lv 30–55
- Road 205 (south, towards Floaroma Town)Fishing with a Super Rod · Lv 30–55
- Road 208Fishing with a Super Rod · Lv 30–55
- Road 209Fishing with a Super Rod · Lv 30–55
- Road 210 (west, towards Celestic Town)Fishing with a Super Rod · Lv 30–55
- Road 212 (east, towards Pastoria City)Fishing with a Super Rod · Lv 30–55
- Road 212 (north, towards Hearthome City)Fishing with a Super Rod · Lv 30–55
- Road 213Fishing with a Super Rod · Lv 30–55
- Road 214Fishing with a Super Rod · Lv 30–55
- Road 218Fishing with a Super Rod · Lv 30–55
- Road 219Fishing with a Super Rod · Lv 30–55
- Road 220Fishing with a Super Rod · Lv 30–55
- Road 221Fishing with a Super Rod · Lv 30–55
- Road 222Fishing with a Super Rod · Lv 30–55
- Road 223Fishing with a Super Rod · Lv 30–55
- Road 224Fishing with a Super Rod · Lv 30–55
- Road 225Fishing with a Super Rod · Lv 30–55
- Road 226Fishing with a Super Rod · Lv 30–55
- Road 227Fishing with a Super Rod · Lv 30–55
- Road 228Fishing with a Super Rod · Lv 30–55
- Road 229Fishing with a Super Rod · Lv 30–55
- Road 230Fishing with a Super Rod · Lv 30–55
- Sendoff SpringFishing with a Super Rod · Lv 30–55
- Sinnoh LeagueFishing with a Super Rod · Lv 30–55
- Sunyshore CityFishing with a Super Rod · Lv 30–55
- Twinleaf TownFishing with a Super Rod · Lv 30–55
- Valley WindworksFishing with a Super Rod · Lv 30–55
- Victory Road (B1F)Fishing with a Super Rod · Lv 30–55
- Victory Road (inside B1F)Fishing with a Super Rod · Lv 30–55
Pearl 53 areas
- Canalave CityFishing with a Super Rod · Lv 30–40
- Celestic TownFishing with a Super Rod · Lv 30–40
- Eterna CityFishing with a Super Rod · Lv 30–55
- Fuego IronworksFishing with a Super Rod · Lv 30–40
- Great Marsh Area 1Fishing with a Good Rod, Fishing with a Super Rod · Lv 15–55
- Great Marsh Area 2Fishing with a Good Rod, Fishing with a Super Rod · Lv 15–55
- Great Marsh Area 3Fishing with a Good Rod, Fishing with a Super Rod · Lv 15–55
- Great Marsh Area 4Fishing with a Good Rod, Fishing with a Super Rod · Lv 15–55
- Great Marsh Area 6Fishing with a Good Rod, Fishing with a Super Rod · Lv 15–55
- Iron Island areaFishing with a Super Rod · Lv 30–40
- Lake AcuityFishing with a Super Rod · Lv 30–55
- Lake ValorFishing with a Super Rod · Lv 30–55
- Lake Verity (after Galactic intervention)Fishing with a Super Rod · Lv 30–55
- Lake Verity (before Galactic intervention)Fishing with a Super Rod · Lv 30–55
- Mount Coronet (1F Road 207)Fishing with a Super Rod · Lv 30–55
- Mount Coronet (4F)Fishing with a Super Rod · Lv 30–55
- Mount Coronet (B1F)Fishing with a Super Rod · Lv 30–55
- Oreburgh Gate (B1F)Fishing with a Super Rod · Lv 30–55
- Pastoria CityFishing with a Super Rod · Lv 30–55
- Ravaged PathFishing with a Super Rod · Lv 30–55
- Resort AreaFishing with a Super Rod · Lv 30–55
- Road 203Fishing with a Super Rod · Lv 30–55
- Road 204 (north, towards Floaroma Town)Fishing with a Super Rod · Lv 30–55
- Road 204 (south, towards Jubilife City)Fishing with a Super Rod · Lv 30–55
- Road 205 (east, towards Eterna City)Fishing with a Super Rod · Lv 30–55
- Road 205 (south, towards Floaroma Town)Fishing with a Super Rod · Lv 30–40
- Road 208Fishing with a Super Rod · Lv 30–55
- Road 209Fishing with a Super Rod · Lv 30–55
- Road 210 (west, towards Celestic Town)Fishing with a Super Rod · Lv 30–55
- Road 212 (east, towards Pastoria City)Fishing with a Super Rod · Lv 30–55
- Road 212 (north, towards Hearthome City)Fishing with a Super Rod · Lv 30–55
- Road 213Fishing with a Super Rod · Lv 30–40
- Road 214Fishing with a Super Rod · Lv 30–55
- Road 218Fishing with a Super Rod · Lv 30–55
- Road 219Fishing with a Super Rod · Lv 30–40
- Road 220Fishing with a Super Rod · Lv 30–40
- Road 221Fishing with a Super Rod · Lv 30–40
- Road 222Fishing with a Super Rod · Lv 30–40
- Road 223Fishing with a Super Rod · Lv 30–40
- Road 224Fishing with a Super Rod · Lv 30–40
- Road 225Fishing with a Super Rod · Lv 30–55
- Road 226Fishing with a Super Rod · Lv 30–40
- Road 227Fishing with a Super Rod · Lv 30–55
- Road 228Fishing with a Super Rod · Lv 30–55
- Road 229Fishing with a Super Rod · Lv 20–55
- Road 230Fishing with a Super Rod · Lv 30–40
- Sendoff SpringFishing with a Super Rod · Lv 30–55
- Sinnoh LeagueFishing with a Super Rod · Lv 30–40
- Sunyshore CityFishing with a Super Rod · Lv 30–40
- Twinleaf TownFishing with a Super Rod · Lv 30–55
- Valley WindworksFishing with a Super Rod · Lv 30–40
- Victory Road (B1F)Fishing with a Super Rod · Lv 20–55
- Victory Road (inside B1F)Fishing with a Super Rod · Lv 20–55
Diamond 53 areas
- Canalave CityFishing with a Super Rod · Lv 30–40
- Celestic TownFishing with a Super Rod · Lv 30–40
- Eterna CityFishing with a Super Rod · Lv 30–55
- Fuego IronworksFishing with a Super Rod · Lv 30–40
- Great Marsh Area 1Fishing with a Good Rod, Fishing with a Super Rod · Lv 15–55
- Great Marsh Area 2Fishing with a Good Rod, Fishing with a Super Rod · Lv 15–55
- Great Marsh Area 3Fishing with a Good Rod, Fishing with a Super Rod · Lv 15–55
- Great Marsh Area 4Fishing with a Good Rod, Fishing with a Super Rod · Lv 15–55
- Great Marsh Area 6Fishing with a Good Rod, Fishing with a Super Rod · Lv 15–55
- Iron Island areaFishing with a Super Rod · Lv 30–40
- Lake AcuityFishing with a Super Rod · Lv 30–55
- Lake ValorFishing with a Super Rod · Lv 30–55
- Lake Verity (after Galactic intervention)Fishing with a Super Rod · Lv 30–55
- Lake Verity (before Galactic intervention)Fishing with a Super Rod · Lv 30–55
- Mount Coronet (1F Road 207)Fishing with a Super Rod · Lv 30–55
- Mount Coronet (4F)Fishing with a Super Rod · Lv 30–55
- Mount Coronet (B1F)Fishing with a Super Rod · Lv 30–55
- Oreburgh Gate (B1F)Fishing with a Super Rod · Lv 30–55
- Pastoria CityFishing with a Super Rod · Lv 30–55
- Ravaged PathFishing with a Super Rod · Lv 30–55
- Resort AreaFishing with a Super Rod · Lv 30–55
- Road 203Fishing with a Super Rod · Lv 30–55
- Road 204 (north, towards Floaroma Town)Fishing with a Super Rod · Lv 30–55
- Road 204 (south, towards Jubilife City)Fishing with a Super Rod · Lv 30–55
- Road 205 (east, towards Eterna City)Fishing with a Super Rod · Lv 30–55
- Road 205 (south, towards Floaroma Town)Fishing with a Super Rod · Lv 30–40
- Road 208Fishing with a Super Rod · Lv 30–55
- Road 209Fishing with a Super Rod · Lv 30–55
- Road 210 (west, towards Celestic Town)Fishing with a Super Rod · Lv 30–55
- Road 212 (east, towards Pastoria City)Fishing with a Super Rod · Lv 30–55
- Road 212 (north, towards Hearthome City)Fishing with a Super Rod · Lv 30–55
- Road 213Fishing with a Super Rod · Lv 30–40
- Road 214Fishing with a Super Rod · Lv 30–55
- Road 218Fishing with a Super Rod · Lv 30–55
- Road 219Fishing with a Super Rod · Lv 30–40
- Road 220Fishing with a Super Rod · Lv 30–40
- Road 221Fishing with a Super Rod · Lv 30–40
- Road 222Fishing with a Super Rod · Lv 30–40
- Road 223Fishing with a Super Rod · Lv 30–40
- Road 224Fishing with a Super Rod · Lv 30–40
- Road 225Fishing with a Super Rod · Lv 30–55
- Road 226Fishing with a Super Rod · Lv 30–40
- Road 227Fishing with a Super Rod · Lv 30–55
- Road 228Fishing with a Super Rod · Lv 30–55
- Road 229Fishing with a Super Rod · Lv 20–55
- Road 230Fishing with a Super Rod · Lv 30–40
- Sendoff SpringFishing with a Super Rod · Lv 30–55
- Sinnoh LeagueFishing with a Super Rod · Lv 30–40
- Sunyshore CityFishing with a Super Rod · Lv 30–40
- Twinleaf TownFishing with a Super Rod · Lv 30–55
- Valley WindworksFishing with a Super Rod · Lv 30–40
- Victory Road (B1F)Fishing with a Super Rod · Lv 20–55
- Victory Road (inside B1F)Fishing with a Super Rod · Lv 20–55
LeafGreen 44 areas
- Berry ForestFishing with a Super Rod · Lv 15–25
- Bond BridgeFishing with a Super Rod · Lv 15–25
- Cape BrinkFishing with a Super Rod · Lv 15–25
- Cerulean Cave (1F)Fishing with a Super Rod · Lv 15–25
- Cerulean Cave (B1F)Fishing with a Super Rod · Lv 15–35
- Cerulean CityFishing with a Super Rod · Lv 15–25
- Cinnabar IslandFishing with a Super Rod · Lv 15–25
- Five IslandFishing with a Super Rod · Lv 15–25
- Five Isle MeadowFishing with a Super Rod · Lv 15–25
- Four IslandFishing with a Super Rod · Lv 15–25
- Fuchsia CityFishing with a Super Rod · Lv 15–25
- Green PathFishing with a Super Rod · Lv 15–25
- Icefall Cave (entrance)Fishing with a Super Rod · Lv 15–25
- Icefall Cave (waterfall)Fishing with a Super Rod · Lv 15–25
- Kindle RoadFishing with a Super Rod · Lv 15–25
- Memorial PillarFishing with a Super Rod · Lv 15–25
- One IslandFishing with a Super Rod · Lv 15–25
- Outcast IslandFishing with a Super Rod · Lv 15–25
- Pallet TownFishing with a Super Rod · Lv 15–25
- Resort GorgeousFishing with a Super Rod · Lv 15–25
- Road 10Fishing with a Super Rod · Lv 15–25
- Road 11Fishing with a Super Rod · Lv 15–25
- Road 12Fishing with a Super Rod · Lv 15–25
- Road 13Fishing with a Super Rod · Lv 15–25
- Road 19Fishing with a Super Rod · Lv 15–25
- Road 20Fishing with a Super Rod · Lv 15–25
- Road 21Fishing with a Super Rod · Lv 15–25
- Road 22Fishing with a Super Rod · Lv 15–25
- Road 23Fishing with a Super Rod · Lv 15–25
- Road 24Fishing with a Super Rod · Lv 15–25
- Road 25Fishing with a Super Rod · Lv 15–25
- Road 4Fishing with a Super Rod · Lv 15–25
- Road 6Fishing with a Super Rod · Lv 15–25
- Ruin ValleyFishing with a Super Rod · Lv 15–25
- S.S. AnneFishing with a Super Rod · Lv 15–25
- Seafoam Islands (B3F)Fishing with a Super Rod · Lv 15–35
- Seafoam Islands (B4F)Fishing with a Super Rod · Lv 15–35
- Tanoby RuinsFishing with a Super Rod · Lv 15–25
- Trainer TowerFishing with a Super Rod · Lv 15–25
- Treasure BeachFishing with a Super Rod · Lv 15–25
- Vermilion CityFishing with a Super Rod · Lv 15–25
- Viridian CityFishing with a Super Rod · Lv 15–25
- Water LabyrinthFishing with a Super Rod · Lv 15–25
- Water PathFishing with a Super Rod · Lv 15–25
FireRed 44 areas
- Berry ForestFishing with a Super Rod · Lv 15–25
- Bond BridgeFishing with a Super Rod · Lv 15–25
- Cape BrinkFishing with a Super Rod · Lv 15–25
- Cerulean Cave (1F)Fishing with a Super Rod · Lv 15–25
- Cerulean Cave (B1F)Fishing with a Super Rod · Lv 15–35
- Cerulean CityFishing with a Super Rod · Lv 15–25
- Cinnabar IslandFishing with a Super Rod · Lv 15–25
- Five IslandFishing with a Super Rod · Lv 15–25
- Five Isle MeadowFishing with a Super Rod · Lv 15–25
- Four IslandFishing with a Super Rod · Lv 15–25
- Fuchsia CityFishing with a Super Rod · Lv 15–25
- Green PathFishing with a Super Rod · Lv 15–25
- Icefall Cave (entrance)Fishing with a Super Rod · Lv 15–25
- Icefall Cave (waterfall)Fishing with a Super Rod · Lv 15–25
- Kindle RoadFishing with a Super Rod · Lv 15–25
- Memorial PillarFishing with a Super Rod · Lv 15–25
- One IslandFishing with a Super Rod · Lv 15–25
- Outcast IslandFishing with a Super Rod · Lv 15–25
- Pallet TownFishing with a Super Rod · Lv 15–25
- Resort GorgeousFishing with a Super Rod · Lv 15–25
- Road 10Fishing with a Super Rod · Lv 15–25
- Road 11Fishing with a Super Rod · Lv 15–25
- Road 12Fishing with a Super Rod · Lv 15–25
- Road 13Fishing with a Super Rod · Lv 15–25
- Road 19Fishing with a Super Rod · Lv 15–25
- Road 20Fishing with a Super Rod · Lv 15–25
- Road 21Fishing with a Super Rod · Lv 15–25
- Road 22Fishing with a Super Rod · Lv 15–25
- Road 23Fishing with a Super Rod · Lv 15–25
- Road 24Fishing with a Super Rod · Lv 15–25
- Road 25Fishing with a Super Rod · Lv 15–25
- Road 4Fishing with a Super Rod · Lv 15–25
- Road 6Fishing with a Super Rod · Lv 15–25
- Ruin ValleyFishing with a Super Rod · Lv 15–25
- S.S. AnneFishing with a Super Rod · Lv 15–25
- Seafoam Islands (B3F)Fishing with a Super Rod · Lv 15–35
- Seafoam Islands (B4F)Fishing with a Super Rod · Lv 15–35
- Tanoby RuinsFishing with a Super Rod · Lv 15–25
- Trainer TowerFishing with a Super Rod · Lv 15–25
- Treasure BeachFishing with a Super Rod · Lv 15–25
- Vermilion CityFishing with a Super Rod · Lv 15–25
- Viridian CityFishing with a Super Rod · Lv 15–25
- Water LabyrinthFishing with a Super Rod · Lv 15–25
- Water PathFishing with a Super Rod · Lv 15–25
Emerald 1 area
- Sootopolis CityFishing with a Super Rod · Lv 5–45
Sapphire 1 area
- Sootopolis CityFishing with a Super Rod · Lv 5–45
Ruby 1 area
- Sootopolis CityFishing with a Super Rod · Lv 5–45
Crystal 2 areas
- Fuchsia CityFishing with a Good Rod, Fishing with a Super Rod · Lv 20–40
- Lake of RageFishing with a Good Rod, Fishing with a Super Rod, Static encounter, Surfing · Lv 15–40
Silver 2 areas
- Fuchsia CityFishing with a Good Rod, Fishing with a Super Rod · Lv 20–40
- Lake of RageFishing with a Good Rod, Fishing with a Super Rod, Static encounter, Surfing · Lv 15–40
Gold 2 areas
- Fuchsia CityFishing with a Good Rod, Fishing with a Super Rod · Lv 20–40
- Lake of RageFishing with a Good Rod, Fishing with a Super Rod, Static encounter, Surfing · Lv 15–40
Yellow 1 area
- Fuchsia CityFishing with a Super Rod · Lv 15
No wild encounter data. It may be obtained by evolving, trading, events, or in newer games (location data is most complete for Gen I–VII).